 |
With my two new Sushi Sketchbooks
in the shops I can do what I like today. How about drawing?
I pick up Drawing on the Right Side of the Brain again.
This is a good opportunity to continue with my ambition to not only
read the book but to do every exercise that Betty
Edwards suggests.
I'm looking forward to this next set of exercises because in modified
contour drawing you are allowed to look at the paper (for
the blind contour drawings that I did on Friday you're not allowed
to peek). You're still expected to spend 90% of the time looking
at the subject.
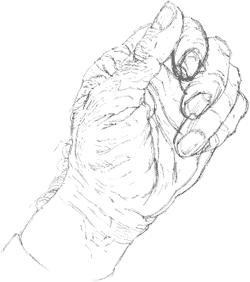
For this 30 minute drawing it was important not to start
with the main outline of the hand. Drawing it is more like doing
a jigsaw: I go from one small interlocking shape to the next and
try to avoid any forms for which the left side of my brain might
have a handy symbol such as 'fingernail' or 'finger'.
Must cut those fingernails! |
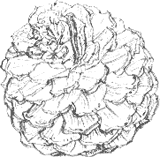 |
Cone, 30 minutes
The temptation might be to sketch in a spiral grid for the cone,
and then fill in the details but this too was drawn in jigsaw fashion:
I started at the top and related each shape to its neighbours.
Each shape is individual; despite first appearances this isn't
made of identical components, like blocks of Lego. |
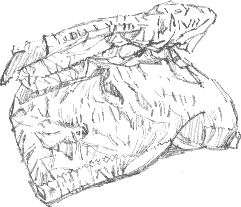 |
Brown paper bag, 20 minutes
In case you're wondering, it contained three satsumas, one of which
I ate after completing the drawing. |
 |
Whisk, 30 minutes
Betty Edwards includes a student drawing of a whisk as an example
of the item of kitchen equipment which she asks you to draw next.
It struck me as being a particularly tricky subject to draw, with
those gently curving forms interlocking in perspective but, once
you've got into the habit of observing the winglike shapes between
the curves it's much easier to sort out. |
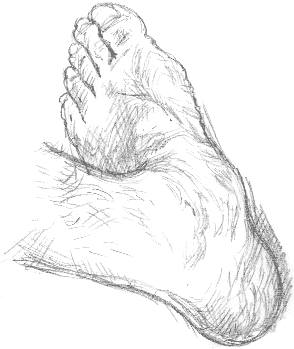 |
Foot, 20 minutes
Well, it's a change from hands.
I put my foot on a cushion on a stool but it was still awkward
to draw as the heel was in shadow and also disappearing behind my
drawing board. You can see that at first I underestimated the size
of the heel - which annoyed me - but I just drew it in again. I
think that leaving in the first attempt adds something to the liveliness
of the drawing.
|
Negative Shapes
  To
emphasise the importance of observing negative shapes Betty Edwards suggests
these exercises. To
emphasise the importance of observing negative shapes Betty Edwards suggests
these exercises.
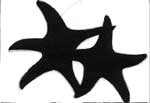
She asks you to draw the starfish (right) on
white paper, then cut out the negative shapes and reassemble them (here
on black paper). You've discarded the starfish you've drawn, but, there
it is: you've reconstructed it simply from the negative shapes around
it.
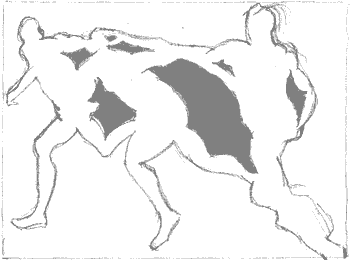
 The
athletes are drawn from an internet sport photograph.
I've shaded in some of the shapes I drew - including a batlike shape and
a penguin-like shape. I tried hard not to draw the shapes of the figures
themselves. They've ended up a looking rather odd, for instance, I'm not
sure what happened to the central figure's head, but concentrating on
the negative shapes has given the group, dare I say it, in the context
of such a wobbly sketch, a Matisse-like rhythm. The
athletes are drawn from an internet sport photograph.
I've shaded in some of the shapes I drew - including a batlike shape and
a penguin-like shape. I tried hard not to draw the shapes of the figures
themselves. They've ended up a looking rather odd, for instance, I'm not
sure what happened to the central figure's head, but concentrating on
the negative shapes has given the group, dare I say it, in the context
of such a wobbly sketch, a Matisse-like rhythm.
Having learnt to see these negative shapes, even a tricky mechanical
subject, like this corkscrew, shouldn't prove too difficult.
Viewfinder Drawings
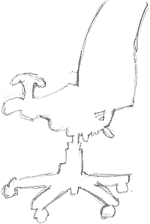
These drawings were made using a viewfinder: a piece
of paper with a rectangle an inch or two across cut in it in the same
proportions as the paper I was drawing on. The viewfinder frame makes
the negative spaces bounding the objects easier to see; for instance in
the drawing of the office chair (left) the
top left corner can be seen as having definite boundaries, like the corner
piece of a jigsaw puzzle.
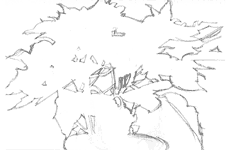
I ran into a bit of difficulty with the poinsettia (right);
I drew each side of the plant as carefully as I could but when I came
to the middle I realised that the plant had come out too wide. I put this
down partly to my shaky hand holding the viewfinder and partly to working
with both eyes open and so getting two slightly differing views of the
subject. 
Richard Bell, richard@willowisland.co.uk |
![]()
![]()