|
I'M FEELING INSPIRED to make
something: I picked up a copy of Mary Maguire's
Scrapbooking, treasured memories while we were out Christmas
shopping this week. I find myself wanting to include a craft element
in my drawings and in the design of my books, even if this means
no more than working in quill pen rather than fibre tip. I feel
the need to stir my work up a bit.
Here's somewhere I can start: I need a new, small box file,
because I've now got so many publications that friends have sent
me, so I'm going to try making one for my collection of John
Welding's Goathland and Awakefield comic
strip diaries. He's just resumed the series after completing a number
of book illustration commissions, so I'd better leave some space
for forthcoming editions.
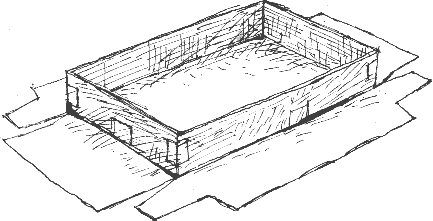
Adapting a design in Scrapbooking, I'm making an open
shallow box for them, which will become the basis for a box file.
I start by cutting a sheet of mounting card a little bigger than
John's booklets (left). |
Cutting Card
I'm not accurate when it comes to measuring and marking out, but
by using the guillotine that I bought for trimming
my home-printed booklets I can avoid the need for a ruler by simply
setting the guide directly from the piece of card I'm matching a
piece to.
I felt that these subjects were too detailed to draw with a quill
pen so I used a dip pen and calligraphy ink, as a change from my
usual fountain pen. |
|
|
|
|
|
1. Cut the base of the box from thick card.
|
2. Cut sides to length of base. |
3. Cut ends to width of base but
minus
two thicknesses of card. |

4. Use small strips of Magic tape to tack together the card to
make the box.
|

5. Cover the box with thick paper.
|
 PVA
Adhesive PVA
Adhesive
I'm using scrap materials that I happen to have around the studio, rather
than the craft supplies suggested in Mary Maguire's book.
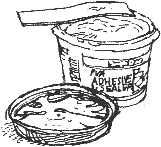
The glue is PVA adhesive which I bought for woodworking
but which can be used to bond wood, brick, ceramic tiles, carpet, polystyrene,
fabric and leather and also as a primer or sealer on plaster and cement.
 The
problem I have with it is the way the paper cockles up. I realise that
this is made worse because I stick the paper to the base of the box first,
then cut the overlapping paper into flaps and only then do I apply the
adhesive. The
problem I have with it is the way the paper cockles up. I realise that
this is made worse because I stick the paper to the base of the box first,
then cut the overlapping paper into flaps and only then do I apply the
adhesive.
This is like trying to paper a wall by adding paste to the wallpaper
a bit at a time, sticking it to the wall as you go: you need to paste
the whole strip, allow it to expand and settle as it takes in moisture
and then apply it to the wall.
Sticky Situations
With that in mind, I try again:
-
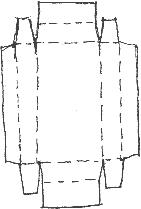
cut the tabs and flats (see diagram 5, above right)
-
apply the adhesive to the whole sheet of paper and let it settle
for a few minutes
-
apply the pasted paper to the card box, smoothing out any bumps by
rubbing it over with a cloth
But I'm still not happy with the results. The thick paper bows out between
the sides and bottom of the box. Perhaps I need to score the folds first.

Richard Bell, richard@willowisland.co.uk |